
(Right click and view image to see a larger image)
A quick guide on how I do the daily white light images in Canon Photo Professional, which is free with canon dslr cameras.
Shoot in Mono and Raw
Then download and open the one you want in the software.
(Right click and select open in edit window)
Shoot in Mono and Raw
Then download and open the one you want in the software.
(Right click and select open in edit window)

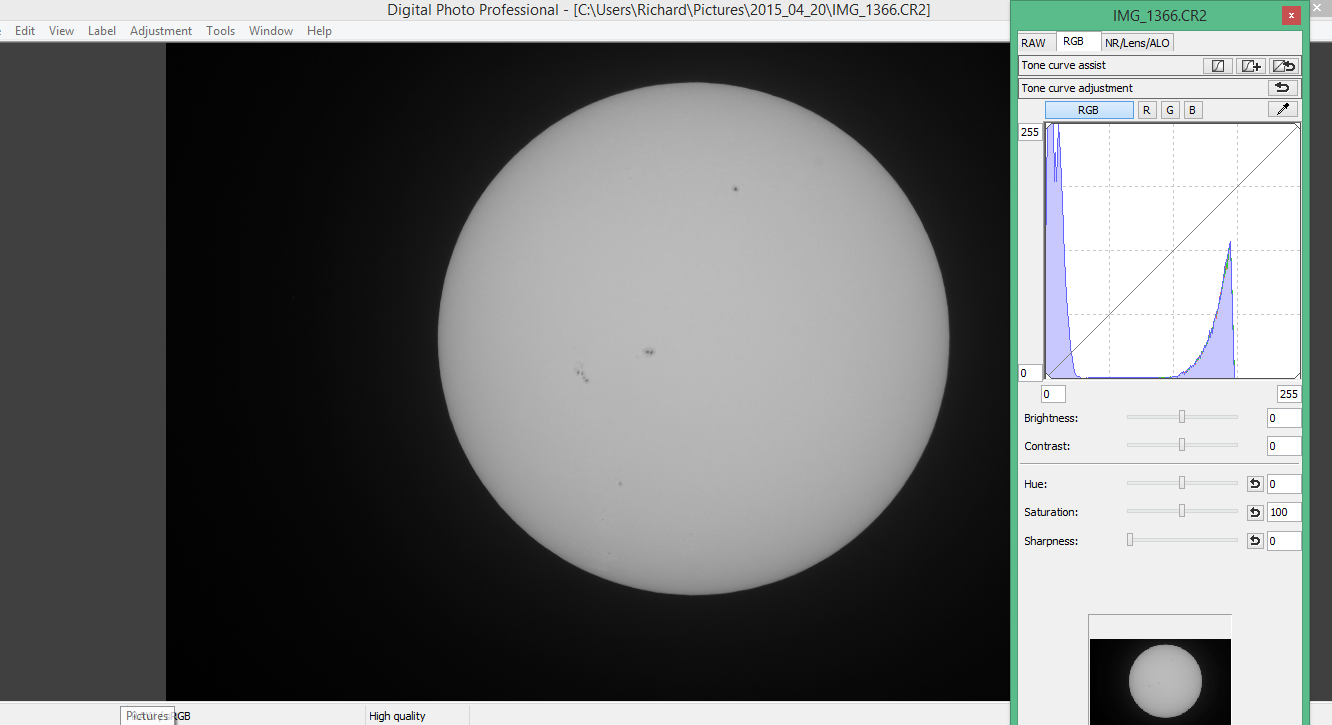
Click the middle tab marked RGB...
I then move the Brightness and Contrast sliders to get the tip of the graph in the centre.
I then move the Brightness and Contrast sliders to get the tip of the graph in the centre.

Then select the first tab marked RAW and adjust the Contrast/highlight/shadow until the disc looks 3D, the settings will shadow the edges slightly so not a flat white image.
When happy with the look, you can then go to the top tabs and click view and 50% to zoom in a bit on any spots.
When happy with the look, you can then go to the top tabs and click view and 50% to zoom in a bit on any spots.

Click the Sharpness menu just above the small preview in the right menu below the graph, and change to Unsharp mask.
Using the Strength/fineness/Threshold, adjust to clean up the image, normally 4/7/1 +- 1 give a good result.
And then click 'File' and 'Convert and save' and off you go.
Then to colour or label just open in an image editor ( I use GIMP as it is free)...
Using the Strength/fineness/Threshold, adjust to clean up the image, normally 4/7/1 +- 1 give a good result.
And then click 'File' and 'Convert and save' and off you go.
Then to colour or label just open in an image editor ( I use GIMP as it is free)...
No comments:
Post a Comment